
How to play Barre Chords on Guitar
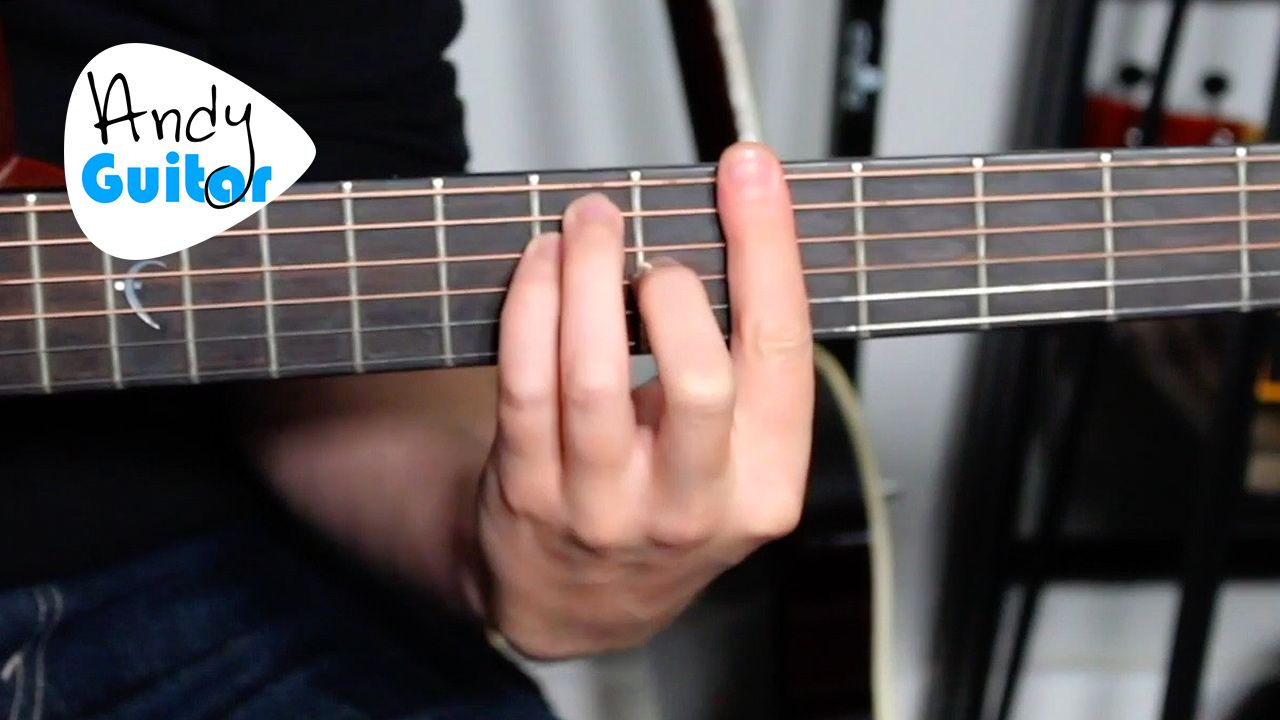
How's it going guys? In this video we're gonna be checking out how to play all the most common bar chords on guitar, including the F bar chord and all major shaped bar chords with their root note on the thickest string, how to change those to minor bar chords, and also A-shaped bar chords which use the A major shape and have their root note on string 5. And the minor shaped bar chords, and some tips to get these chords ringing out great, and how to change between these chords and any chord, which will essentially enable you to be able to play any song that you want to do from a rhythm point of view on guitar. That is a level that most people want to be able to get to. And it is typically the barcodes that give people the most trouble. This video is in support of my new intermediate course, which there's a link to on the screen and in the description, but before we get started on this, I want to let you know about a video I watched recently featuring Katie Tunstall, the acoustic guitarist, singer-songwriter Katie Tunstall. Fantastic guitarist, fantastic artist, really inspired me to play more. Gigs and and get using a looper pedal and playing acoustic guitar and and writing songs, you know, back when, when she first arrived around 2006. And in the video I saw of her, she said she doesn't like playing bar chords and that she never uses them really when she's playing live or in the songs, in the songs that she writes. And that just really hit home because I've been, you know, telling my private students and I've been, Um, you know, featuring in my videos loads of alternatives to, uh, bar chords, loads of easier kind of guitar chord hacks, I guess, and different things that we can look at. Um, but you you all have to know that these aren't little hacks and, and ways that are used just by beginners to learn and get away into playing guitar. These tricks. Can be used by the pros to, you know, just because they prefer them, just because they prefer the sound to them, but it still enables them to do what they want to do, and that's so important to learn. However, a lot of these cheats and hacks are actually based on knowing these shapes, knowing the locations, so what I will preface this lesson with. Is that these chords do not have to be ringing out perfectly for this lesson to be still super useful for you and to knowing about barcodes to be super useful for you. This is the gateway, or indeed the answer to be able to play any chord you want to on guitar, which will in theory give you the knowledge you need to be able to play any song that you want to go on to learn. So, where we're going to start this video is I want you to play just the standard E major chord. Like this. This is the first chord that I would teach any absolute beginner, and it's where we're going to start this video, because all the subsequent chords that we're gonna play in a second are based off of this chord shape. Now we sayship because it's not based on these finger positions, cause we're actually going to swap these fingers now. I'm playing this with fingers 12 and 3. And what I'd like you to do is swap them for fingers 23, and 4. Now that can definitely confuse many people, but let me just show you what just happened. We have fingers 12, and 3 in the positions that you no doubt know, you know how to play an E-chord if you're watching this video. But we're gonna swap them for fingers 23 and 4 like that. So we have finger 2. On string 3123. Finger 3 and finger 4, and yes, I want you to give it a strong and make sure it's ringing out the way that we want. Now if that isn't happening yet and that isn't um comfortable and it's very unnatural for you, this would be the first thing that I would work on if I was working on barcodes with a private student. I'll be making sure that they can actually physically make this shape. And that they can take the fingers off and get back there. Fairly comfortably. Though we will also move on for the sake of time in this video. What I would then want you to do when your fingers are in this position, and they look like this, with the thumb lower just lower than the back of the neck, sort of the thumb here. And with the elbow into the side crucially. We're gonna move these 3 fingers up 1 fret, which, do that one more time, we're gonna go just to there. Keep your fingers still when you do that, but move them so they're at the 2nd and then the 3rd fret. And then you guessed it, put that 1st finger down at the 1st fret. But do me a favour, don't press. Down and don't put any excess pressure on any of the fingers or the strings just yet. So what I'm doing at the moment is resting my fingers in position, but I'm not squeezing, I'm not pressing down at all. And it, it can be hard to see that on the video, but if I squeeze, it looks like this. And then if I unsqueeze and I just have my fingers in this position, that's the crucial thing. That's the thing we wanna train first of all, not it, ringing out perfectly and. All this kind of thing, we're gonna get that in a second, but I need you to be able to get from this position to here, and then place that first finger down without there being any problems. Now problems can be these 2nd, 3rd and 4th fingers just not wanting to stay down and flying off, or them having real trouble finding this position. Once those fingers are a little bit more comfortable and you've lifted off a few times and they're starting to find their way, again, we haven't pressed down to the fretboard yet, we're just touching the strings nice and light. We can then try pressing all of them down. And trying to get this to ring out. Now we don't expect it to ring out perfectly in the beginning, and what I would say is, I would decide on moving this finger just a little bit higher so it pokes out kind of a little bit too much. And that if it's at this side of the fret and you've got your elbow in, that should mean that this is gonna ring out for most people. What I'm gonna do straight away now is to get you to move this up, another fret, and then strum. And then another fret and strum. And then another fret and strum. And then the final time, which would get us up to the 5th fret. So my first finger now has gone 12345, this is the 5th fret. It has a dot on it and your guitar likely has a dot on it too. And then we have fingers 23 and 4, boom, there we go. Because the root note of that chord is an A, or the sixth string is an A note, this chord is an A major chord. Which is exactly the same as our A major chord here. And that can be the case, and that is how we can play any major chord on guitar just by actually knowing this one shape, which, you know, to you may just be the F chord, but we can move that up to anywhere. Or any fret on the guitar, notice when I'm moving up the shape of my hand isn't changing. But we can play any chord on guitar, any major chord with that one chord shape. All you have to know is that that chord shape is the same as it looks here, you're on the right positions, you're on the right strings, etc. and then know what frets, what is the note at the fret that that first finger is on. So then it can be really handy just to know, uh, to begin with the the dotted frets, which the first dot for most people is at the third fret, and that would be a G. The next dot would be an A. And the next dot would be a B. In reality this is something that we cover at in in my beginner's course, I think it's at level 5, but this is something that we always need a bit of a reminder on because we start to need to know what every fret is to enable you to play any chord. It's not any physically tougher. In fact, if anything, it gets a little easier. The higher up the net you go. Up until around the middle part, it can get tougher up here, but in this area of the neck it's easier than here because the strings have been held up at this side, so don't put too much pressure on yourself for that F chord to be perfect initially. It's all about. Getting the cord ringing out a little bit higher. Once you can do that, the next thing we want to do is learn to lift off this middle finger. And try and get this ringing out, now again, the tip is just to move that first finger up a little bit more from where it may be. And suddenly we have the minor version of all those chords, so we have major and then minor. And those two chord shapes, along with knowing all the root notes that every fret on string six alone, will give you any chord you can play on guitar, any chord that is available to us, and you've always got that safe option to know how to, for example, play a B chord, which will be at the 7th fret. Using this chord shape. However, that can mean that we're awfully high up the fretboard, um, for a lot of chord shapes that we may wish to play, like, for example, that B chord. So we also have another shape that we can do the same principle to and move up the fretboard with, and that is the A major shape. So this is the A major chord. Just using the first three fingers. And then we have fingers 23 and 4. That we'd replace 12 and 3 with, which would give us this first finger. The freedom to then move this up by one fret and put that first finger down. Now notice that first finger now is lower because it's still on the side of the first finger, which is the biggest thing that makes it be able to ring out. If I'm like this, it might not ring out, if I'm like this, it does. Also knowing that it only has to hold down the thinnest string and string 5. You know that's all we need to actually press down on. And then the uh thickest string is actually muted by the tip of that first finger. And once we're doing that, we should really, as soon as possible, start moving it up the fretboard and get to around 5th fret. And then we can see that these chords basically look like it's the A major chord, and our first finger is acting as a capo. But we can move that capo or our first finger anywhere we need to. And then some of you may be aware that we can also do the same thing with the A minor shape, which we would need to replace with 23 and 4. And that's how we can play any minor chord. This time though, using the A shape, so A major or A minor shape, and using 1/5 fret root note. So when we use the A shapes, the root note is on string 5, which is a lot of extra knowledge that you need. We need to know what the note names are at every fret on string 5. And the three that we need to know first of all, and again at those first three dots, which are a C, D, and an E. Now that was a really quick run through everything that you need to know about barcodes. It takes a lot longer than that for it to really assimilate and for you to know all the fret names, for example, that takes memorising. And just for you to get used to this much more taxing shape in your fingers. And this is primarily the the reason that I created my Improver guitar course, which yes, I do have the book here, it is. My orange one. This includes all these barcodes, but keeps all the other items simple so that we can get you also playing along to full songs and get you playing onto the jam tracks that are in this course. So everything that I've just covered there, the major and minor shaped barcodes on route 6, and then on, you know, using the E shape and using the A shape. Along with all the easier tricks of the trade that we would use, are covered in this course, but without all the excess sort of stuff to confuse you. It just works through that. And if that's something that you feel will help you, that is what the improver course is for. And the my intermediate course really takes the baton on from that and covers, you know, the major scale, arpeggios, 16th strumming, all the other items, but the improver. keeps everything else simple so that we can really get you playing onto full songs and master bar chords and give you all the alternatives to barcodes that I talked about with my Katie Tunstall story. That will give most people watching these videos the most success to work through them in that order. I really feel passionate about that. Some of those easier alternatives that I just mentioned include rather than playing this fashion of playing the F chord, we can use this fashion. Which um keeps the 3rd, 2nd and 3rd and 4th finger in the same place, but puts the 1st finger just covering the thinnest two strings, so it's still barring but just barring two strings. The thumb can either press down or um just mute that thickest string, this would still be a valid F chord, and that would still give us the ability to play any chord. And even if we take the middle finger off and move that first finger up, any minor chord, also, so we've got the major and the minor chord, and this is fantastic for the electric guitarists among you, cos this is a real um grip that is used for a lot of lead guitar. You know, this is used all the time. And it really helps bring that on, and this barcode shape, you know, we, you don't have to use that barely at all, especially on electric guitar, but the, the finger positions will change, but the shape is the same, we, we need to, we need to have that outline and then there are actually many different options for how to play it. How to play that exact same chord. Another really common one that I want to tell you about is just the B minor chord, because this one crops up all the time in real songs that you may want to play. This is the B minor chord as a bar chord with the root note on string 5. There's the B minor chord. This happens all the time in the songs in the key of D and the key of G. And one really common sort of alternative is this one, commonly used by Ed Sheeran, particularly in the song Castle on the Hill. That is used in place of a B minor. So we have 123. Really cool way of playing that B minor chord. Another tip if you do want to go for the bar chord, is to go to the flat first finger and use the flat first finger A chord, which will also really help with your bar chords. You know, just to start using that sort of pinching muscle and really building this muscle, which can be, you know, another thing to try is um the E chord, I'm playing the A chord. Not only with fingers 23 and 4, and just maybe, you know, having a strum through the buffalo Springfield for what it's worth. My literally my guitar lesson one. 23 and 4. But crucially, having that thumb lower, so it's here, so that you will start to feel that barcord muscle, that gripping, pinching muscle work. And start to build it up gradually. And they're all the biggest tips and ideas that I can give you to really improve your barcodes because it holds so many people back and it doesn't have to. There are always alternatives to play every chord, but it is crucial at an intermediate level to be aware of these shapes, even if they're not ringing out yet, because the overall shape will enable you to know where the notes are and then be able to figure out your alternative. Way that works for you to move your plane forward. Thank you so much for checking out this video, that was so much content, you know, especially towards the end in a short space of time. We work through this much more steady, much more um methodically through my, first of all, my improver lessons and then my intermediate course which these free lessons are in support of. I'll link to the uh more free content here on YouTube so you can get more of a feel what to it. But as I say, these videos are in support of my intermediate course. Thank you so much for the support, I hope this video's really helped you. Bar cords should not be the thing that holds you back from improving on guitar. There are so many other things that we can uh sort of get you up to a higher level with, but knowing the ships can be a crucial stepping stone for most people. Thank you so much for checking out this video guys. um I hope it really helps you.
In this video
This video is made in support of Andy's intermediate Guitar course. Click the button below for more info!
See below a full video and writeup showing how to play every E and A share barre chord on guitar. These are the most common barre chord shapes used in intermediate level songs.
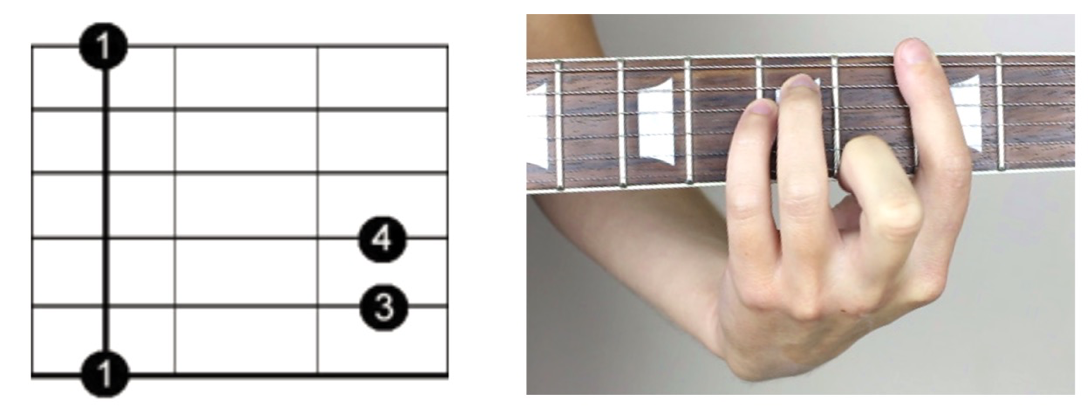
Here is a recap of the Root 6 barre chord shapes for major and minor barre chords. These are commonly referred to as E major shape or E minor shape barre chords, as they are these shapes but moved higher up the neck.
E major shape barre chord

E minor shape barre chord
String 6 root notes
This diagram shows all the note names on string 6 of the guitar neck. When playing either of the shapes above,

The blue colour indicates the sharp notes, shown by the # symbol e.g. F sharp is written F#.
Every sharp note can also be called a flat too e.g. F# is the same as Gb (G flat) because in music these are enharmonic equivalents (same note that can have different names!)
Whether a note is called a sharp or a flat depends entirely on the key it is in, which we will look at in the jamming section of this course.
Here is a recap of the Root 5 barre chord shapes for major and minor barre chords. These are commonly referred to as A major shape or A minor shape barre chords, as they are these shapes but moved higher up the neck.
A major shape barre chord

A minor shape barre chord

String 5 root notes
Same concept as the previous lesson, here are all the note names on string 5, which will enable you to play any major or minor chord with your A shape barre chords!

Like this? Want more?
This video is made in support of Andy's intermediate Guitar course. Click the button below for more info!