
Day 1 - Absolute beginners lesson and first song
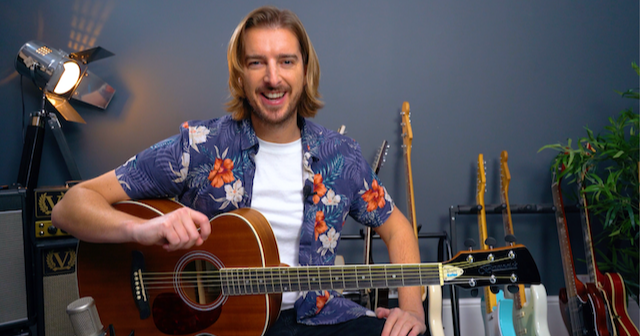
Welcome to day one of this 10 day acoustic guitar programme. In this video, we're gonna be getting to know our acoustic guitar a little bit better, learning how to fret notes and fret chords, and a little bit on basic rhythm. Then we're gonna look at the easiest two chords to play on our acoustic guitar, and then try and play those with a basic strumming pattern to a song, to a jam track that I've made up that's really super cool, and in. Day two, we're gonna be learning a simple lead part over this same track, so you're learning the rhythm part and the lead part, just like all the songs that you love, just like you've seen the bands that you love do. Whatever style of music you're into, this is the perfect starting point to get you to that end goal of strumming along to real songs. But first of all, let's take a little look at our acoustic guitars. This is my signature. Beginner's acoustic guitar, um, but any acoustic guitar will work, and even if all you have is an electric guitar, it's basically laid out the same. It's laid out like a person, where we have a head, the neck of the guitar, and then the body. And like me, they kind of have long necks, but whether you have electric or acoustic guitar, they're basically the same. Standard acoustic or electric guitars have 6 strings, which we number 1 to 6123. 456, and then we have metal frets, which go vertically along the fretboard, but it's the fret area that we're interested in, and this is fret 1, fret 2, fret 3, etc. But when we're fretting a note, we need to place our fingers right up against the metal fret itself. So if I needed to play string 1, fret 1, I would place my first finger here. Not here in the middle, and certainly not here at the far side of the fret, because that's just gonna mean I have to press down harder, you get deeper lines in your fingers, and all of that is made easier by having any finger placed right up against the fret. Now because I'm a pop and rock guitar player, I always have my guitar, electrical acoustic placed on my right knee because I'm right-handed. Some people choose to play the guitar like this. This is absolutely fine, but it's also better for playing the guitar very high up the fretboard. This area here. Now, all of this course is really concerned with the 1st 3 frets, because we're beginners, right? This is the first area that we need to get to know. And therefore, highly recommend, if you're right-handed, place the guitar on your right knee, wedge it right in at your body, elbow on top, and then we kind of get this balance of that acoustic guitar, where we can actually be quite free with the chord hand. If you're left-handed, it's just the exact opposite, but wedge the guitar right in at your hip, elbow on top, and that means, again, this part of the neck doesn't. Need to be supported too much with the fretting hand, it's actually supported with the body and with the arm like this. Now let's have a look at the two chords that we need to play along to this first jam track. These two chords have kind of complex names, but are the simplest to play, so we're just gonna focus really on how to physically do them in this first lesson, and we'll look more at the other things you need to know about how chords are made a little bit later. Both of these chords use just your first two fingers, and we're gonna place our first finger on string 5. Fret 2. So that's string 5 up from the bottom, here's number 5. Fret 1 would be here, fret 2 is here. Then we place our middle finger directly below it, which means that we do have to have this first finger a little bit back from being right next to the. Fret wire, because our fingers are gonna end up on this slight angle where our fingers are pointing at me. So notice that this is a chord, and when I'm playing a chord, my fingers are not like this, they're on an angle, and this thumb isn't right over the top, it's just sat. At the back, but slightly ahead of the back of the neck like this, so it's not in the middle, it's just a little bit on top. First finger, 2nd finger, and that's our first chord. Now when we hold anything, if I was asked to pick up this guitar, and if you just relax your fingers for a second, I'd hold it like this, wouldn't I? But this isn't how we need to hold or press down guitar chords, we kind of need to make this claw hand. I need you to do this, genuinely. Good idea if you just do this with your hand first of all, before making this chord shape now, so make sure you do that, because if I sit that thumb on top, and then I have 1 finger and 2nd finger, and make that claw hand, even though I'm here, make a claw hand like this, suddenly, all the strings will ring out, and if I just strum that with my thumb. There it is, right, there's my first chord, that's exactly what we're going for, that's the E minor chord. If I press down this chord, like I would normally pick up anything and pick up this guitar, it's not going to ring out, it's not right, so we need those fingers really curled over and this first knuckle in your fingers, curled over like this, thumb just sat slightly ahead of the middle at the back of the neck, and then finally, I need you to be able to take your first finger and place it through this hole here, which all we're checking is we're not touching the bottom of the guitar, we don't want to be doing this ever with, certainly not with chords at least, we want to have a little bit of clearance here. And that's what it looks like here, we need to be able to get a finger through that. So recap, finger one. Finger 2, both at the 2nd fret on string 4 and string 5, thumb, just slightly ahead of the middle of the back of the neck. And be able to place a finger through here, all of this also tends to be made easier if this elbow is in at the side. But as long as we're not sticking the elbow too far out, that's not too much of a worry. Much more important, claws, thumb at the back of the neck, bit of space at the bottom. And then, if you do have a pick, you wanna hold it, probably just to begin with, with two fingers at the back and then your thumb, so hold it like this. Let me show you that one more time, thumb at the back, first two fingers over, and then just try and catch every string, let's just drag it down. All 6 strings, and that's what we should be sounding like. Now, you might notice that your guitar is a little bit out of tune. We do tend to need to tune our guitars before every time that we play, especially if it goes back in its case. I'll leave a tuner video at the bottom of this page, and there's always one that's searchable and findable on my website, and a guitar. Dot co.uk, so you'll always find it there. All the advice on tuners and things like that, I will link to down below. Let's presume that you're in tune now. If you need to pause this video, please go ahead. But when we're ready, let's fret this chord one more time, first two fingers basically together, claw hand, thumb at the back, a little bit of space here, and strum. And that's our first chord, which is called the E minor chord. Keep your fingers here, but just relax them, keep them on the strings, but relax them, and what we're gonna do is move these two fingers down together, down a string. Keep the thumb down, lift off of these two fingers, and move down with as little movement as possible, each finger down a string together. This is already our second chord, and this is an A sus 2, and if I chop all six strings. It sounds like that, sounds really cool. It's a uh mysterious chord, and I like a bit of that in music. That is at the 2nd fret on string 3 and string 4. And there is our second chord, the 8 sus 2. If we then keep the thumb where it is, lift them off, and then we go back to this first chord. We're back to the E minor chord, or chord number 1. We'll lift them off again and move them down to the 2nd position, 2nd chord, a sus 2, 2nd chord is the sus 2 chord. OK, let's mute our strings, which we do with the right hand. And we just place them there, and then relax this hand, shake it out a little bit, we're expecting a little bit of tension there, but er that's the first option we have with practising chords, drum it once, change chords, strum it again. What we can also do is just work on this hand and you don't even have to. Drum, as long as you're really vigilant with your eyes and your finger placement, we can go for this first chord, lift off, press down for the second chord, that Aus 2, and back, and we don't even need to strum, and this just works on these finger motions. Now what we want to work on is again, claw hand, thumb at the back, space here. And then when we lift off, keep that thumb at the back, minimum motion between changing between one chord and the next. And then keeping your fingers down kind of as long as possible with as small a gap as possible, and that's gonna mean we're in really good stead, so you've got two ways of practising this, strum, lift off, strum, lift off, strum, or just kind of drill it with this hand, treat it like you're doing reps at the gym or something. And see how fast you can actually change when all your focus is just on this hand. Remember that for any other chords that you ever learn, you can just practise it with this hand and see how fast that you can do it. Now to be able to play with any song, we really need to understand about bars and beats. This is how we time things in music, it's how we count everything, and it's the underlying pulse of every song you've ever heard, this idea of bars and beats. The beat is just the main pulse in the song, typically we're gonna, Especially in this course, we're always gonna do it to a count of 4, so 1234. We might do more strums than that, we might do less strums than that, but that beat is always there as an underlying pulse. It's kind of the thing that you dance to or thing that you clap along to, basically. And that counter 4 as a whole is called a bar, B A R. So bar 11234, bar 2234, bar 3. And so on and so forth, notice that every click that I did, every pulse is even in time. They're all at regular intervals, and that's the most important thing. Once we're started, we're trying to keep everything regular to a regimented kind of grid, but the strumming pattern that we do can vary from that, and the easiest strumming pattern that we can do is just once per bar on beat one. This is sort of nicknamed spreads because it's spread out throughout the entire bar, but if we place our fingers on that first chord one more time and just strum once. 234, and then mute, that was one bar of the E minor chord. If we go for 2 bars, that sounds like this, 1234. 234, and pause. Do that along with me now and join in from that E minor chord in 23412341234, and stop. Then we're gonna change to that second chord and do the same thing. 1 strum per bar, 2 bars in total, for example. 12341234. And then we change back and repeat from there. Join in with me this time, let's see how this goes. Ready on that first chord, E minor, in 1234. 23412, lift off and change to that second chord, strum. 234, strum, 23, lift off, change back. 1234, strum again, 23, next chord, 12341234. Relax your fingers, hopefully that's something that you can do. Uh, but really as a minimum thing, that would be the thing that we wanted to get from day one, and even if you can only do that and not this next bit with more strumming, you can play along to this jam track, just keep that going, and that is the first part of our jam track that we're gonna be. Learning in a second and we're gonna be playing along to. But the next strumming pattern that we really want to get down as soon as possible is playing on the beat. So all that means is every count that we say, and we don't have to say it for that beat to still be there, but let's say it for now just so that we know that uh that's what we're playing to, it's just a down strum on every beat. Same chord progression, so still 2 bars of the first chord, 2 bars of the second chord, so 8 strums in total. And that sounds like this. 123. 4 and again, 23, we lift off and play the second chord. 1234, and again, 2. Now I am playing all six strings here at all times, that's what I encourage you to do as well. If you can, and if you've done this a few times before, you might know that I'm quite encouraged to have this thumb on top, which mutes, and that would be best for this second chord. That's how it would be written, to be strummed from string 5. But that is detail which we can focus on a little bit later, and we can focus on at another point. First of all, we're looking at rhythm and timing and playing along to these jam tracks as the priority, because that's the focus of this 10 day series, OK, just to be aware, muting the thumb. Or strumming the second chord from string 5 is encouraged but not essential. It still sounds fine, just strumming all 6 strings for this jam track. Let's have a go at that together, and then we'll have a go at playing along to this jam track, but here's what we're gonna do, it's gonna be strumming on the beat and 2 bars of each chord. Join in with me, place your fingers on the first chord, ready in 2. 3 41. 3 And again. To And then to A. 12. And again, 23, lift, and we play the first chord again, and we repeat. And next chord. 23, and end on 1 strum. Of the E minor chord, that's where we're gonna finish, OK, and that is everything we need to cover to be able to play along to this jam track. However, playing along to anything else is kind of a new skill for most people, and it's a separate skill to everything that we've worked on already, so it does take the same amount of kind of practise just to do that part alone, there's something to, to cover there. And the main thing is that we're going to do the one strums, the E minor chord, and then again, and then the A, and then again. And then we play on the beat after that, OK? For every jam track, there is gonna be a counting, which is just played on a Hyatt, played by the drums, and it goes to a count of one. 2 1234, and then we start, OK, and that's when we start with the 1234123, then change. And then we're on playing on the beat. There is no substitution here from just digging in and having a go. And if it doesn't all fall together the first time, well, we don't expect it to, cos we're total beginners, right? But you'd be amazed that from working on this in this way, and then having a little practise, maybe just to the audio, so you've not always got the uh visual cue of me, you're fully focused on what you're doing. It, you would be amazed with what you're able to do, and the feeling that you get of joining into music and for it kind of sounding like, hopefully, proper music from day one. I just think it, I've seen phenomenal things with other people, and I would love that to happen for you. So let's have a go here, I will shout out some prompts for you, but as I say, just gotta kind of jump in with this thing. Give it a go and see how it goes and refine from there. Keep jumping in, keep having another go, and try and keep going with your main focus on the strumming hand and the next chord, just jump in at the next thing. If anything's not 100% right, that's OK, we're beginners. Try and get the next bit 100% right. When we do this intro, that progression just happens twice, so one. 234, and again. Strum the next chord. And again And then all of that happens again, and then after that we're just on the beat. So I've just pressed play on my jam track and then you have a few seconds to place your fingers on the correct chord and we wait for the counting. 2 123, strum, 1234, and again, lift off next chord. 1234, and again, back to the E minor, chord number 1, go. 234. 23, next chord, 123, last time, back to the first chord and on the beat, and 1. 3. one. And lift, 2nd chord. Back to the first chord. One. 3. And again Or ASOS 2. Back to the first chord, and we keep that going, back to the first chord, one. And again. Next chord Card number 2 If you've dropped out, just jump back in here in 3. call number 12. again. A 2 But you've always got a restart point. Here it comes. 12 Aces 2123. To And E Minor, this is the last time. Keep it going just a little longer. Aces 2. 3 11 strum of the E minor now, and There you go, that's our first song. Sounds kind of moody, it sounds like, I was thinking of Pink Floyd when I created this, I was thinking, yeah, that sounds pretty mean and moody, but hopefully that's something that you can do. If not, it just takes a few repetitions, but I don't want you to concern yourself at all with playing this perfect before we move on, causes actually lesson two, we're working on something quite different, which is playing single strings. We will be playing. on the beat, but we're not going to be playing chords in lesson two. And each day kind of builds like this. We've got 1 ft here, we've got the next foot on the other step of the ladder using quite a different skill, and then we go back to working on the first skill again. And we don't need every step to be perfect before moving on to the next day, because the increments are not, are not too bad, they're not too difficult at all. It is It's very step by step, but at any point, you're in control. You can do this, guys. Let me know how that goes in the comments on this lesson page directly below, and I can't wait to hear some feedback from you guys to see how this feels. Lesson two, please check that out, however lesson one went, because I think you're gonna be really excited when we start looking at those materials, and I will see you in that video tomorrow.
In this video
Track 1a - Em Asus2-
Welcome to day 1 of the my 10 day challenge for absolute beginner acoustic guitar!
Today we will look at the often overlooked basics of fretting notes and playing technique. We will then look at the easiest 2 chords to play on guitar and make a song with them!
Play along video
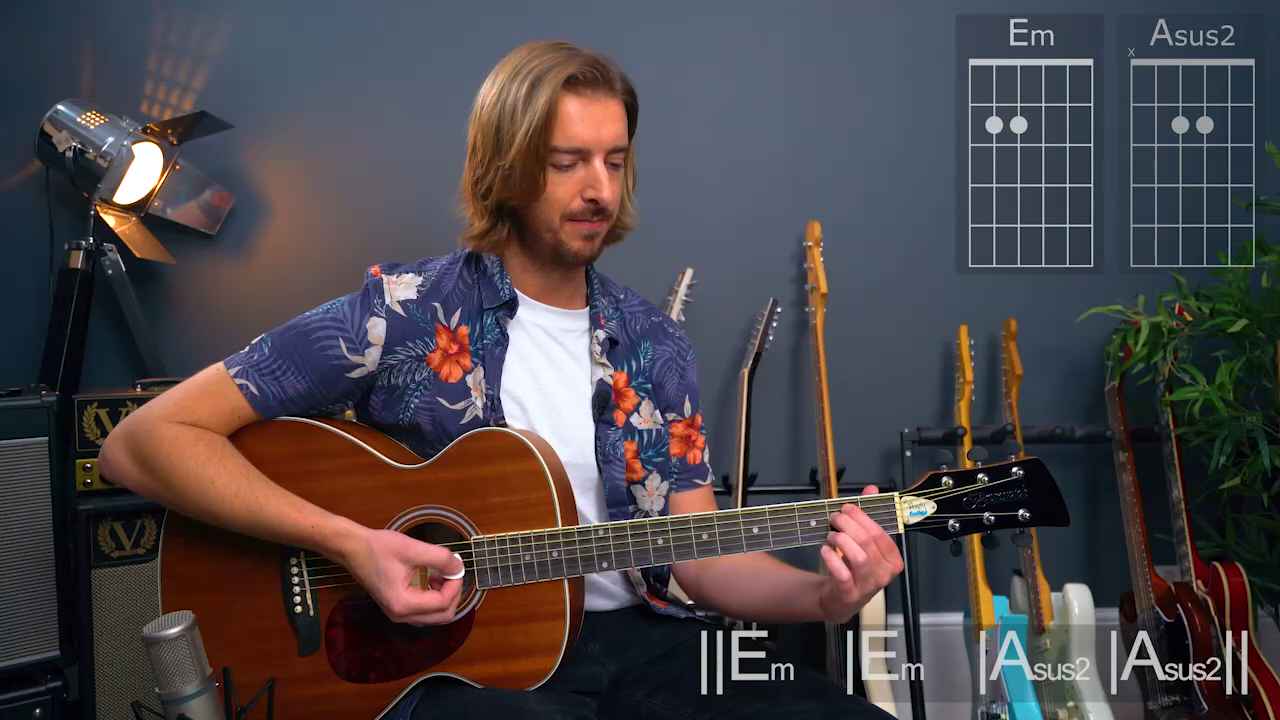
This clip is in the main lesson video, but I've included it here too for anyone who just wants to rewatch or play along to the performance section.