How to read TAB and 'Hot Cross Buns'

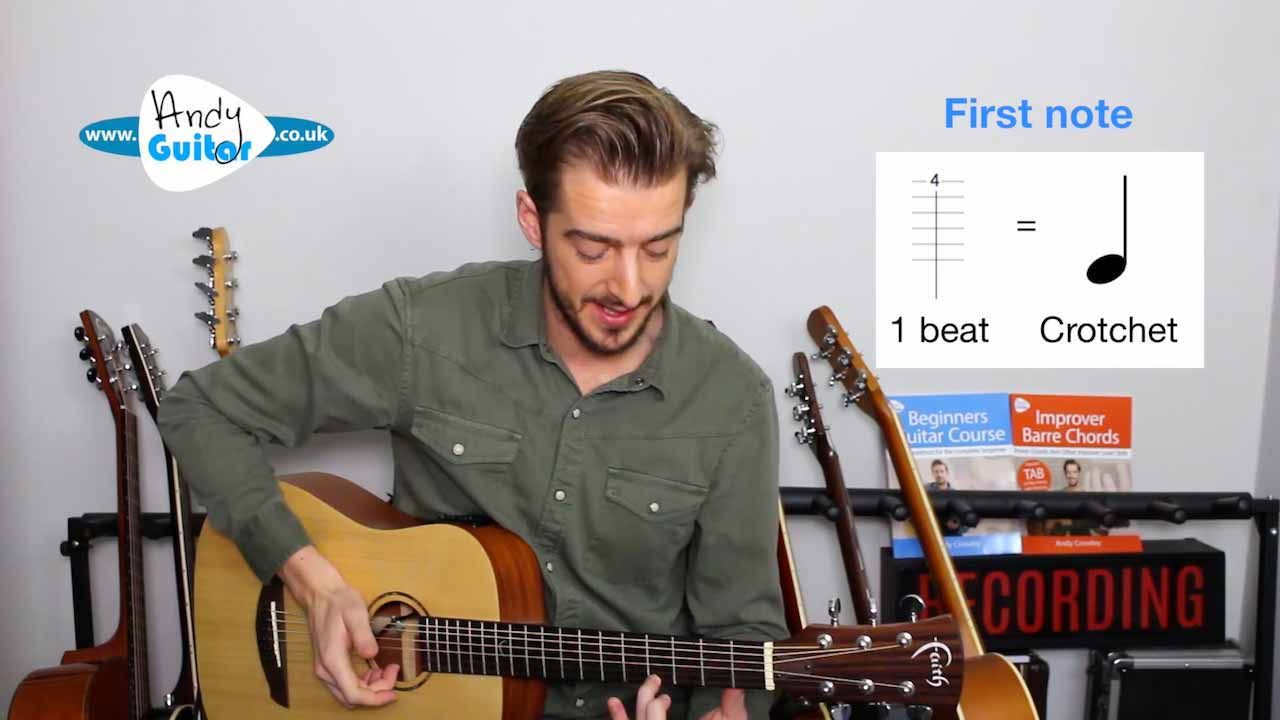
What is going on guys? Welcome to my fingerstyle starter course, where we're looking at how to play some really simple melodies in finger style and get you started working with the major scale through 12 real song melodies that you will recognise and hopefully really enjoy playing. This series is the precursor to the fingerstyle course that I released. Last year. The feedback that I had from this was everyone uh made some great progress with the fingerstyle patterns and even the songs that were in this course. But as soon as we started playing single note melodies, um, it, it, that was the trickiest part of this, and I realised that I hadn't done enough work through my free lessons and and the lessons on the website. Um, in getting you guys ready to play single note melodies in finger style. So that is the entire intention of this course, to make sure that when you get onto the next one, that the follow on from this, which is this one, you will be ready for those single note playing, and we'll be covering fingerstyle principles with the picking hand and also techniques and things with the, uh, with the chord playing hand to help you do that. Now, it would be ideal if you um had worked through at least some of the. Beginner's course, ideally all of it, um, but most of the single note stuff that we're playing here is covered at around level 5 of that beginner's course. So the C major scale and just starting with single note playing and, and a little bit somewhat of knowing what a key is. But you don't strictly need to have done any of that because I will be explaining so much of of that background that you need, particularly in the 1st 2 or 3 lessons. After that, it's gonna be all techniques and learning. Uh, towards the end, some quite complex sort of single note finger style stuff, but these first few lessons are super, super easy because I have a real leave no person behind mentality with this, especially seeing as this is the start of this new finger style, um, sort of syllabus that I'm setting up from complete beginner and and going on from, From intermediate player all the way up to advanced, this is, this is where we need to get people started with single note melodies. This first one is super easy, it's just got 3 notes, but please don't skip it. Please look at the and apply the principles that we'll look at while we learn it. And let's get in for a close-up now and I will show you what we're gonna be playing. Hot cross buns, this is a super simple melody, as I say, just one line on the tab that accompanies this course. But we're gonna be covering all the principles of finger style, and what I'd like us to do is begin with the 3rd finger at the 4th fret on the thinnest string. Now when we place this finger down, we want it to be at this side of the fret, not at this side, so that we don't have to press as hard down. And also so it rings out every time, because if we're at this side of the frets and we don't press down hard enough, it it doesn't always ring out. Also, a lot of acoustic guitars, especially beginner ones, cheaper ones, can have much higher action and can have, uh, basically the strings are very high off the fretboard, which makes everything that we do in this course harder because we need. Single strings to ring out. It can really help just to put a newer set of strings on it by one of the brands that I recommend and you can see those on the on the website. um but know that it even playing single notes, we need them to be ringing out and your guitar does impact. If you can play a few others to get a feel for this sort of stuff, that would really help. But we're gonna get this one ringing out. And then we need our 1st finger to go at the 2nd fret. Also on the first string, on the thinnest string. And then the final note is going to be the open E string. So we're only playing the one string and therefore it doesn't really matter what uh fingers that we use at this time. Though I'd recommend using our middle finger just because of what's going to happen in bar three basically. So we have played. The 4th fret, so that looks like a number 4 on the tab. And then 2nd fret, which is a number 2 on the tab, and then 0. Playing each of those with the middle finger and that covers bars 1 and 2 on the tab that accompanies this video. Now in the tab that I write, I always make sure that it also has the rhythm symbols. So the first note here, that number 4, that fourth fret, lasts a beat, and that is shown by this symbol, which is technically called a crotchet. And that means it lasts a beat. 1. When we get to the 2nd note, that also lasts a beat. And when they're written in tab, uh, we just have that stick, that line underneath it, indicating that it lasts a beat. The 0, the open string, that lasts 2 beats, which the technical symbol for that is this, but um in the tab, that is indicated by the shorter line, and when we have rhythm and tab on the same stave, that is what it would look like. So we have. 20 frets wise, but rhythm wise, that happens on beats 12341234. And as we go through, I'll just point out anything new on the tab that I need to explain. But that is a little bit of background on on that so that we could just read the tab and play this exactly as I am doing it now. Bar 3, we have those notes joined together. Now if you've done my beginner's course, you'll recognise that as eighths, as 18 strumming perhaps, or an 8 rhythm, where um we have them joined together, which means each note lasts half a beat. So this bar 3 would go like this. So that was the open string, so 0000 2222. And that is to a rhythm of 1 and 2 and 3 and 4 and. And then the final bar is just the same as the 1st 1, 420. So hopefully that's helped you read the tab a little bit more and to to use that to remind you of of what we're playing here, which is is really the best way to to use tab along with videos as sort of a refresher, so you don't have to skip in the middle of a video to remind yourself what you were doing. Um, the other thing that I want to point out, even at this. early stage is that there are two ways to play these notes, even though it's, it's kind of super easy. This is just a great opportunity to do it. What you will see me do most likely, most of the time throughout this course is have my thumb on top and playing the notes in this fashion with my fingers on an angle. That is more of a pop, a rock, and even kind of a folk style and really sets us up just in case we're ever gonna do any string bending. OK, anytime we do this, a string bend, we need to support that bend and we need to have your finger on an angle. We're never going to bend a string in that same fashion that I've just demoed where my fingers are are in this this position like this. However, this position can be good for some stretches. And is considered to be more the the classical style and and a more sort of traditional style of finger style guitar. My thumb therefore is right in the middle of the fretboard at at the back and my fingers are horizontal to the frets. Again at this side of the fret. Most beginners are going to really struggle with that method and you're going to find it a lot easier and have a lot more success if we're using uh and playing the notes in this fashion. Especially on many beginner acoustic guitars which can be a little bit chunkier and have bigger necks. This is going to really work for you. But remember this is strictly used either to be able to kind of stretch your your fingers further along the the fretboard, you know, all the way to fret 5 here, without that sort of big gap in your fingers that that this happens, so so to do this. But also will help with with string bending, as I say, that position is great for string bending. I encourage this, we're gonna do a lot of songs that either end or are in the key of C. and we've got our fingers on this angle like this. But this is also very useful in an ideal world, get used to using both. But at this early stage, just go for whichever one is comfortable. Let's just have a refresher now. The first bar, just one more time. It was like this and the uh the quicker bar 3 was 1. 2 and And finishing Here Let's just do that together a couple more times and that will be the end of this first lesson. In 1234. So hopefully that's something that you can do, but um the real thing that I want you to pay attention to once you've learnt the notes is making sure there are no spaces, no gaps uh between each of the notes, especially on the quicker section because this is how you're going to be able to play those quicker sections that happen later in this course especially, but also here, this bit. Don't keep your finger on the string. Not like this, we're just flicking it out. OK, and uh it will sound a lot better and a lot sweeter if we can keep your thumb ahead of the uh strings like this. Rather than sort of being a thumbs up and going like this, which can lead to a scratchy sound or or um not picking the the strings correctly. We want your thumb to be like on the side like this and plucking into the hand. Like that, try and apply those couple of things when we go through this now for the final time in 1234. And that is how to play our first super simple melody. Um, that used 3 notes out of the E major scale. So the open E, 2 and 4th is the 1st 3 notes. Of this major scale. Most of the other songs in this course are going to use the C major scale that is taught at level 5 of my beginner's course, and that lesson is totally for free at Andyguitar.co.uk. Highly recommend that you check it out cause we're gonna be using it in this next video where we're gonna learn how to play probably the most recognisable song of all time, Happy Birthday. I hope you'll join me for that one.
In this video
Here’s our first simple song, Hot Crossed Buns. It’s worth checking that you understand how to play this melody fully and understand how it is written before moving on to some of the more popular pieces in this course. It’s also an opportunity to get used to reading guitar TAB (short for Tablature)
Song 1 - Hot Cross Buns
Reading TAB
The numbers above show the fret numbers you should play on which string. We choose which finger we use depending on the situation.
The video that accompanies this lesson shows which finger to use to play each note.
Reading rhythms in TAB
Not all guitar TAB shows rhythms, but each TAB in this course does.
The first two notes (written ‘4’ and ‘2’) last one beats, known as a Quarter Note as it lasts a quarter of the bar.
The third note (written 0’) lasts two beats, known as a Half Note as it lasts half a bar.
Get the songbook!
Get the TAB for every song in this course in a beautifully printed full colour songbook along with more help and guidance from Andy.
Ideal for those who like to have the TAB in a book open in front of them while watching the videos on full screen!
Available on Amazon.co.uk and Amazon.com only.
Fingerstyle Starter Course
Recommended Songs
Enjoying this course? Want to test out your new skills? Find out my recommended song tutorials that accompany this course and get total access to the site by signing up today!