
Rudiments Of Fingerstyle Lesson 1
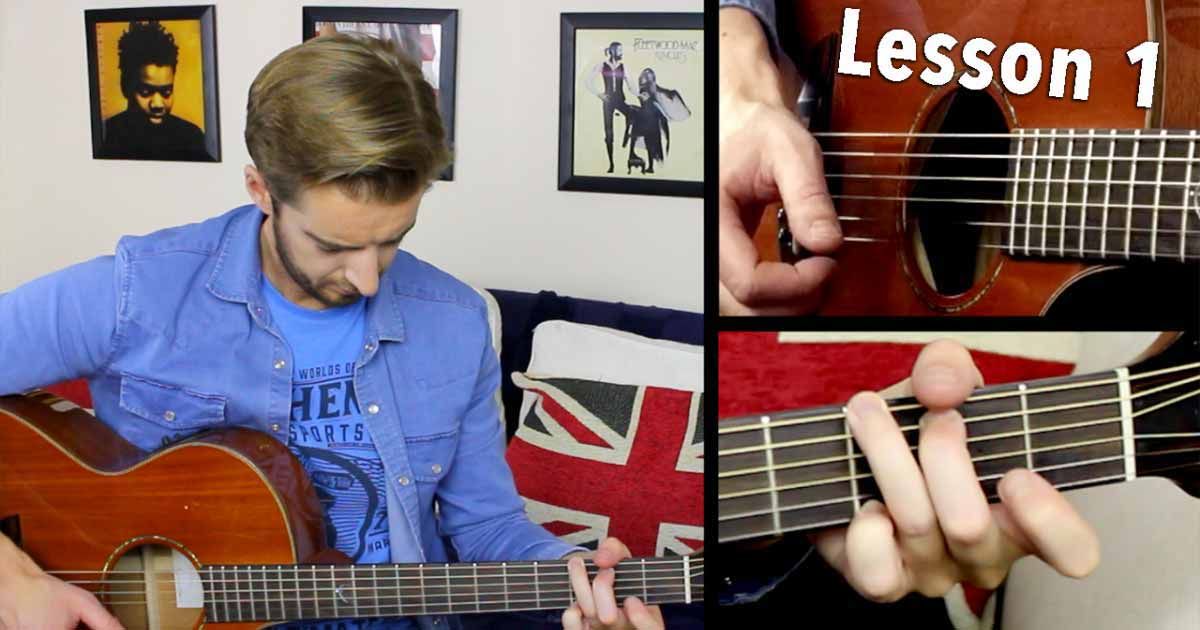
How's it going guys, and welcome to the first video in this 3 video miniseries, which I am calling Rudiments of Finger Style Guitar. I'm calling it Rudiments of Finger style guitar because there, in my experience, there are certain elements that we just have to have down. Before we can really progress and and get to what we keep calling this next level of of finger style guitar, and without having each of these elements down, there is typically some kind of block in your playing which prevents you from playing a certain song that you wanna be able to play or playing a certain move, or just having the kind of freedom in finger style that you want. This series is as an appendix to my Fingertar DVD and book course, which is coming out over the next few days, and it's somewhat in promotion of it as well. But the tab for everything we're gonna cover in this series is totally for free and it's on my website just here, just to get a feel of what kind of stuff I offer. So go grab your guitar and come join me. So in this first video, we're gonna be looking at just the G major scale and how it can be played by also playing the root note of a G chord. Also. In this fashion. Now we're going to begin just on the scale itself to make sure we've covered a few principles and so that everyone understands exactly what we're doing and. My full fingerstyle DVD and course also begins at an absolute basic level, presuming no prior knowledge of fingerstyle. So trust me, you're safe in this lesson if you've never covered anything like this before, but I think by following these videos, you'll really surprise yourself with how far we can get. So we need to play the thinnest Estring at 3rd fret, and we're going to play it with our little finger, because the chord we're going to be playing. During this, we'll end up being a G major chord, and we're going to play that G major chord in the finger style fashion, which is like this. But to begin with, all we need is that little finger on the thinnest Estring at the 3rd fret. Now looking at the fingerpicking hand at the right hand, uh, the principle that we're following in this video is that the 1st 3 fingers are going to be placed underneath the thinnest 3 strings. Just so that we assign them to those fingers, we're not gonna keep them there, but they're always, finger 3 is always going to play string 12 to string 2, and finger 1 to play string 3, and they'll pluck underneath, into the hand like this. So when we play this first note, we have to do it with the 3rd finger. So that we free up the other fingers to do other things. And the thumb, just to cover all the principles, can go between any of the thicker three strings, and this is what I call the orthodox method and how it was taught to me was the Orthodox method. The next note we're going to play is just the 1st finger at the 2nd fret of string one. And we're going to do that again with the 3rd finger, because that's the string that this one is assigned to. Now this can feel really strange fingering at the moment if uh with the left hand or the chord playing hand, because we're going from the little to the 1st on frets that are next door to each other. But when we add the root note in later. It becomes quite obvious that we have to use that kind of uh those fingers. The next note is really easy, it's the open string. So we have, in total, 3. 20. In the tab, in the first line of the tab, which is the G major scale, descending, and remember that tab is totally for free on the website, if you click here, or in the description, it will take you to that page. The fourth note. Is again at the 3rd fret, but this time on string 2, so it's just here. And now we can begin to hear that major scale sound of this which is so distinctive. Duh. But we're learning it from the highest note from the top G note. Descending, so coming down the scale. The next note is the 1st finger this time, and we're playing these two notes on the 2nd string with the middle finger of the uh picking hand. And we're using the little finger at 3rd fret and the 1st finger at the 1st fret just here. So with the first finger. And then again we're going to go to the open string. So fret numbers wise, and in the tab, this would look like 3. 20. 310. And we've almost finished, so all the hard work's nearly done for this section at least, where we've gone 3. 2 0 on the thinnest string. 3 10. And then finally, just to finish, we're going to play the middle finger at the 2nd fret of the 3rd string. And then to the open 3rd string, and that 3rd string is of course the G. So we have gone from the highest G. In open position to an octave below that, so we've played the entire scale in one position, one octave. And in total, this sounds like. And that is our G major scale descending, which is the first line of the free tab available on the website. The second line shows us how to play um that same set of notes, but ascending, so going up the scale, starting from the lowest note that we finished on just then. The open 3rd string. So we're going to do the same as what we've just done in reverse. Uh, if you really struggle with that first section, the joy of YouTube and video in general is that you can rewind, either back to the start or back 10 seconds, just click that back button and it'll whiz you back a little bit. So you can have a few goes at this. One of the main things that you're watching out for at this stage is making sure you're using the correct fingers with both hands, but particularly with the finger style hands. So the 3rd finger to the middle finger. So the first finger. And also we're looking for a really uh a slow but even tempo. Speed is not my primary concern with you guys at this point in time. Evenness is, so making sure that every note is around the speed of a ticking clock or a little bit faster than the ticking clock, but only a little bit. And that we have all the notes ringing out until the next one is played. None of this. This is what we call staccato playing. Where everything is short and sharp, we don't want that. We want this. And we get that by taking a little bit more care and going a little bit slower to make sure we're not stopping any notes ringing out before the next one's played. So exercise 2. We're going for the major scale. Using the same fingers as previously and uh let's go through that really slowly just so that everyone can follow this. So we begin as we finished before with the first finger at the open 3 string. The G note. That gives this scale its name. Next, the middle finger on that same string. Fairly simple so far, but we need to make sure that we're using the first finger and then paying attention to the fingers that we're using from here. So next one's the middle finger on string 2. And it's just that the open string. First finger. Again on string two. Little finger Fret 3 of string 2. And those 5, 1st 5 notes one more time, just to get a feel for what this scale sounds like, so this is the major scale. We can hear that distinctive sound now which is um also sounds the same as do. Uh, sol, you may be familiar with that. Exactly the same thing, it's just in this video, of course, we're gonna refer to these notes as their letter names, and those letter names are G. A And after A, everything is just alphabetical order. D And then we'll cover the rest as we go, so one more time. Open to 2. Open one. 3, threat numbers wise. And then of course to finish off, it is open. Second fret, so 2. And 3rd fret, but 3rd fret, always has to be played with our little finger, cause that 3rd finger. Is going to be used for the root note in a matter of minutes, just in not too long at all. But let's just recap this section first of all, so the G major scale ascending, exercise 2. And we will go from there, so open. Open to 2. One 3. Open. 23. This time play along in 234. And remember I've used all fingers there apart from the third finger, so really make sure this time that you're not using this 3rd finger, cause that's got another job in a second. One more time, G major scale ascending from the open 3rd string from the G in 234. And there it is, that G major scale. Don't be afraid to spend a little bit of time with that. But we're going to move on now to exercise 3, where we're adding a. The bass note. We're not using Travis picking just yet, we're just gonna keep the 3rd finger on the thickest Estring, and we're gonna be playing this note at a consistent tempo, along with. The scale that we've just learned. So in a way, Every time that we add an element here, the difficulty will jump up. And this is to be expected. It does mean that by the time we get certain to video 3 in this series, we're going to be really at a fully intermediate level. We're gonna be looking at some really high level, um, finger style games. Now you might surprise yourself how far you get along this line, but if you're needing more help, that is the idea of that fingerstyle course that I advertised earlier, and if you want to learn more about that, you can click just up here. Um, I'll try not to mention it too many more times. Let us move on. Exercise 3 on this tab. Is as I've just demoed. We're playing the same scale that we've just done. But we're playing. 3rd finger, that 3rd fret, which is the root note of our G chord, and if you've never played a G chord like this, this is why, it's so we can play. Melodic notes At the same time so that we can play a melody and chords at the same time, which is what makes fingerstyle. It gives it its beauty some way, it, you know, I don't want to digress too much, but that's some of the point of it, so that we can, we can kind of do that. Um, so it's the same if you've played the major scale a second ago, in the fashion that I demoed it, we're using the exact same fingers here, so it doesn't change too much, but what we're gonna be doing is playing, for example, at the beginning, the 3rd finger, playing string one and the thumb. At the same time, And then we're gonna go for the 1st finger on the 2nd note of the major scale. And the thumb at the same time again. And then the open at the same time? And that would sound like. And if we begin there And if you have a a couple of goes at that yourself. That gives you the idea of of what we're going for from here. For the next string, it's the little finger of course again at 3rd fret, and again. With the thumb. Then first finger of course at first fret. Bit more of a stretch there, but not too dissimilar to, you know, a C chord or anything, which is why if you haven't mastered the changes between a G and a C at this stage, or even done some barcodes, I really advise you go for it causes some of the stretches in finger style and, strength needed. We can get the best way I believe to learn a lot of those is by playing chords and and getting your rhythm guitar down first, but just to have a recap. At this exercise 3. This is G major scale, 3rd, 2nd, open. 3rd to 3 And then 2nd to open. Now to work through this in the correct manner, I really want us to, when we go back on ourselves, so in this same exercise, exercise 3, we're also going to go ascending. You can hear hear that uh do re mi sound there, it's not actually do re mi, but it's the same sound as it cos it's the major scale. Um, what we need to play is that open note, so that G that we play the open third string. We need to play that again. And the reason for that is so everything evens out and we cover two bars in total when we play this again. We're gonna play the end, the first and last notes. Twice, OK, so we, we play each of those again. So this is exercise 3. In total. Which would give us 16 notes in total, because there are 8 notes in the scale, and that means that we can move up in difficulty, uh, going forward, and it does make it, it makes it an awful lot easier basically. We will move on now to exercise 4 where all we're going to shake up is the rhythm. But when we shake up the rhythm a little bit, uh, things do get a lot more complicated, and playing the first and last note again, so playing them twice at the end of the sequence and at the start, uh, really helps. So let me just give you a demo first of all of the difference here on exercise 4. So in essence, it's exactly the same exercise that we just did, but we're alternating between the notes of the major scale, which we covered right at the start, and then the bass note in the thumb, which begins to give us this finger style sound. That sound that we all love if you're this far into this video. This must be something that you're interested in, um, but it can really step up the difficulty. So what do we wanna watch out for? Well, as I say, speed isn't anywhere near as important as getting everything even. Everything here should be at an evenly spaced pace. After that, really listen out to the quality of the notes and make sure the quality and sound is even. And we don't have Some notes being really loud and some notes not being heard er before moving on, and if that's not happening yet, um with this one, you really want to peg it back to one of the easier ones and have another run up to the harder exercises in this one. So this will be the last one of this particular video. Where we Alternate The thumb, and we're having the thumb on the offbeat and the major scale on the beat. So to walk you through this one more time, we play the first note of the G major scale at the highest note first. Then we hit the thumb. Then we're going to hit the 1st finger, playing the 2nd fret. The cord is still down. And we hit the thumb again. So we've played 4 notes. 1. 234. It is then the open string. And the thumb. And the little finger, then the string below, so on string 2, played by finger 2. And that should sound like this. OK. One and And And for and. Now if that is really tough for you and it's, we're not getting that sound that we're wanting, really work through the previous exercise, so exercise 3. And try and play this without any spaces between the notes, so no gaps. And with that Third finger, really comfortable. I tend to leave my middle finger down at the 2nd fret. You don't have to. Um, it can help because we're gonna be moving on to another exercise in a in a later video where we're going for the sea. But. That is what we're working towards in this first video. And my acid test for any little exercises like this, or scales or whatever it is you happen to be practising, is to play it 4 times through without making a note mistake. That is how you know that you can move on. Uh. You can do this to a metronome as well, and I really think 80 BPM would be the perfect uh BPM to practise this at. Just again a little bit faster than a ticking clock, kind of like this tempo. So the exercise 3. Around that tempo, but as soon as we get on to exercise 4. 88 to BPM is for the major scale. Around there. And then of course the thumb in between that makes it feel twice as fast. And if you're, if you're struggling with going from uh string 3 to string 1, checking out my uh inside out. Series, which was a previous video that I uploaded a couple of weeks ago, can really help with that. If it's just the right-hand principles that you're wanting help with, then the inside out to outside in lessons that that I teach and are on YouTube here, can really help with that. That is also one of the main exercises and uh parts of my fingerstyle course, so definitely check that out if you haven't already. Check out part two by clicking the link on the screen now, and please share and like this video if you've found it beneficial.
In this video
Welcome to this advanced fingerstyle mini series that I have named Rudiments Of Fingerstyle!
This series is designed to iron out any kinks in your fingerstyle playing. We'll start off super easy, but progress on to a fully advanced level by the end of these lessons!
It is also a great way to go from playing a basic single note line to playing proper fingerstyle guitar, and to show you how a melody or scale can be played while keeping a bass line going, which is played with the thumb!
Pick string one with your third finger, string 2 with your second finger and string three with your index finger. Play the thickest string with the thumb.


Rudiments Of Fingerstyle
Recommended Songs
Enjoying this course? Want to test out your new skills? Find out my recommended song tutorials that accompany this course and get total access to the site by signing up today!